Automate Visual Regression Testing


A website is the face that your company shows to the world. An incredible amount of value is placed on the aesthetics of the site for your business. Visual bugs such as font, layout, and rendering issues are common problems that plague every website. As a website grows, manually testing and monitoring every visual aspect becomes too tedious.
What Is Visual Regression?
Visual regression is a return to a less developed state for the visual element on a web page. Often this happens after a change to the website such as a new feature, CSS changes, or code update.
Essentially, visual regression testing is taking and comparing a screenshot of a web page to a baseline screenshot. This simple testing method shows if a previously working page broke as a result of a code change, update or fix. It highlights visual alterations between iterations or versions of a site.
Traditional “automated” functional testing with Selenium is ineffective to find these defects. They are high maintenance, run slowly, and not suitable for frequent release testing.
This article explains more about automating visual regression testing, including its key concepts and challenges.
Why Do We Need Visual Regression Testing?
Visual regression could be introduced in many ways - security update, module/plugin update, patches, theming, and new site features. Without fully understanding a project, a developer is often unable to know if a change would affect the visual output of another part of the website. A quality assurance (QA) process is often employed at this stage to manually testing, comparing, and trying to identify that no discrepancy is introduced. The process is then repeated across many device viewports.
Without visual regression testing, developers can use a method called manual visual comparison. Manual visual comparison is a spot-the-difference eye exercise. It is time-consuming, unproductive, and often misses the mark. One will not be able to cover the entire site or even the majority of the site. A machine’s vision will do a better and more consistent job than a human’s vision to give you a pixel-perfect web page.
Visual regression testing can be broken down into 3 main parts:
- Baseline: the originally recorded screenshot as a reference
- Test: the current screenshot
- Diff: the comparison of Baseline and the Test, a difference will be indicated and fail the test. Changes can be approved to update the baseline screenshot.
The baseline screenshots could serve as a record of how the website should look like. A developer without a full understanding of the project could know the difference with the comparison. Visual regression testing is able to provide good error reporting, down to a pixel compare and a color code change. Different device viewports can be tested and compared. This testing process is generally many magnitudes faster than humans.
Visual regression testing is not perfect. Depending on the configuration and features of the tool, there could be false positives. Example issues could be caused by font antialiasing, dynamic content, animation, and even website page speed.
BackstopJS
We’re looking for a visual regression testing tool that is
- Performance
- Lightweight
- Low maintenance
- Easy to interpret the results
- Shareable within a project for all developers
- Can be triggered on-demand, any time, as needed
After testing multiple tools, we ended up with BackstopJS.
BackstopJS is a visual regression testing tool that renders test with Chrome Headless via Puppeteer. It features
-
In-browser reporting UI with visual diff inspector, and a cool scrubber comparison
-
Simple JSON config
-
Simulate user interactions with Puppeteer scripts
-
Easy to learn and use, only 4 commands to learn
-
Docker integration, to eliminate cross-platform rendering issues
-
Works with CI/CD
-
Can be revision control, making it shareable among developers
-
On-demand, run any time
-
Works with the website, any page, and JS frameworks
Thinking about a website audit?
Testing Your Website
By default, for a simple test, only need to configure the backstop.json. Our recommended practice is to separate them by environments, Dev, Test, and Live respectively as:
- backstop-dev.json
- backstop-test.json
- backstop-live.json
This is an example of a complete config file:
url is the page you want to test, and compare it with referenceUrl. The baseline screenshots could be generated via backstop-live.json and use to compare with Dev test.
Example Test
A report will be opened on the browser, showing the number of passed and failed visual tests.
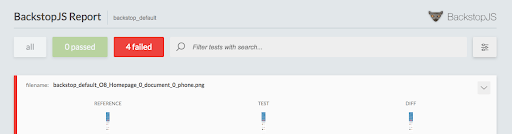
BackstopJS Report
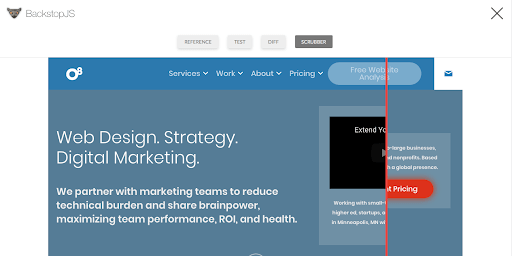
For each test, you can drill down and access the detailed screenshot for the baseline, test, the diff, and a scrubber to compare them side by side.
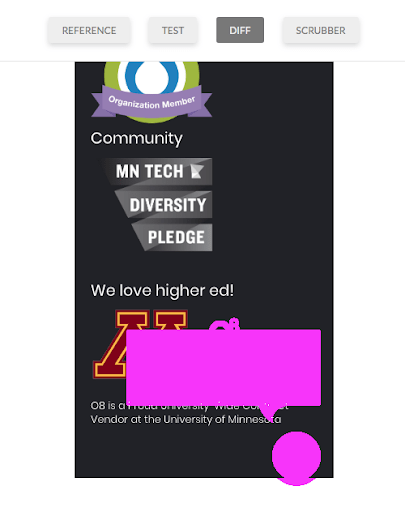
Here's a comparison of Reference and Test with the differences highlighted.
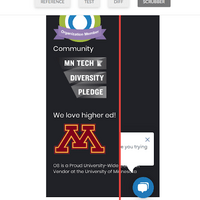
Here's a scrubber view to compare them side by side. We're missing the live chat!
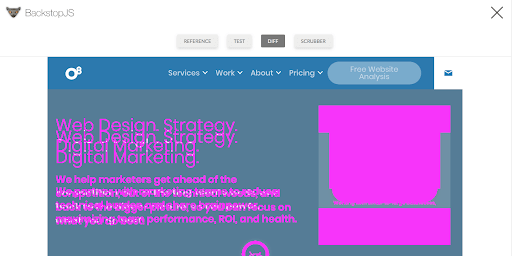
Here's another example showing the differences in desktop viewport.
It's caused by the change in the right-hand box.
Advanced Scenarios
Other available parameters are:
Examples
“Delay” parameter is a useful parameter in case the page load is slower, the media are not fully loaded or JS not completed executed.
{
"label": "O8 Homepage",
"url": "https://www.o8.agency/",
"delay": 4000
}
Wait for 4s prior to screenshot.
Hiding a Component
If a site contains components like an advertisement section, videos, and other content that is not important for the testing area, then those components can be hidden before taking a screenshot.
{
"label": "O8 Homepage",
"url": "https://www.o8.agency/",
"hideSelectors": [
"#someAdsBlock"
]
}
Testing Menu
Modern menus mostly use some form of dropdown horizontal navigation. To test each menu, for example, we can use hoverSelector
{
"label": "O8 Homepage",
"url": "https://www.o8.agency/",
"hoverSelector": ".primary .link--services a"
}
For a menu that uses the ‘click to open dropdown’ method, we can use clickSelector, explain in the next section.
Dismiss a Cookie Popup
Locate the cookie dialog button class or id, and use the clickSelector to automatically click the CSS selector before taking a screenshot.
{
"label": "O8 Homepage",
"url": "https://www.o8.agency/",
"clickSelector": ".iubenda-cs-accept-btn"
}
The same can be used to test opening a dropdown menu triggered by the click event.
Another way to simulate user interaction is to use the global script in backstop_data/engine_scripts/puppet/onReady.js. Take our example of the cookie popup, instead of repeating it for every scenario, this can be handled globally on the onReady event.
module.exports = async (page, scenario, vp) => {
console.log('SCENARIO > ' + scenario.label);
await require('./clickAndHoverHelper')(page, scenario);
// remove iubenda cookie dialog.
await page.waitFor('.iubenda-cs-accept-btn', { 'timeout': 2000 });
await page.click('.iubenda-cs-accept-btn');
// add more ready handlers here...
};
We could use all Puppeteer API here to interact with the web page. What is happening here is we wait for the .iubenda-cs-accept-btn to be ready before clicking on the Accept button.
